Never fear, the rib stitch is here! This easy to make stitch is perfect for scarf-ends, sock cuffs, sleeve ends, and even edging on garments and hats!
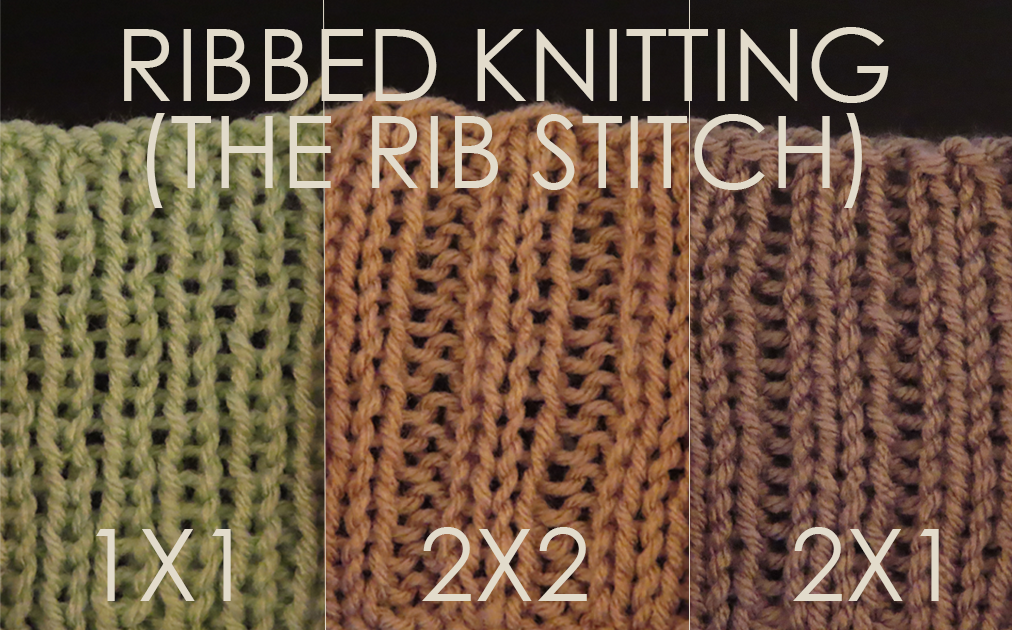
When we talk about the rib stitch (also known as “ribbed knitting”), we speak in terms of an A x B rib. A being the number of knit stitches in the repeat, and B being the number of purl stitches in the repeat.
As we move through a few examples of ribbed knitting, you’ll get a better understanding of what we mean by “the repeat”.
Lets get started!
Things you’ll need:
-
Yarn of choice
-
Needles of choice
Notes:
-
Have fun!
Rib Stitch: 1 x 1
Prep Step!
Cast on any even number of stitches to your needle. (aka: any multiple of 2)
Why a multiple of 2? This is because there is a total of 2 stitches in the pattern repeat! (1 + 1 = 2)
Don’t know how to cast-on? Check out this tutorial on How to Cast On Stitches!

Pattern
ROW 1: *K1, P1* until end of row.
Repeat Row 1until desired length.
Notes:
-
The *asterisks* you see mean that you should repeat the stitches between them until you hit the last stitch.
-
If you look closely, the difference between this row and the last one is that they are opposites! The knits are purls and the purls are knits!
Finish!
Cast off while following the Knit and Purl stitch pattern of Row 1.

Your finished pattern should be super stretchy and look the same on both the front and back of the piece.

Rib Stitch: 2 x 2
Prep Step!
Cast on any multiple of 4 stitches to your needle. (ex: 4, 8, 12, 16, …)
Why a multiple of 2? This is because there is a total of 2 stitches in the pattern repeat! (1 + 1 = 2)
Don’t know how to cast-on? Check out this tutorial on How to Cast On Stitches!

Pattern
ROW 1: *K2, P2* until end of row.
Repeat Row 1 until desired length.
Notes:
-
The *asterisks* you see mean that you should repeat the stitches between them until you hit the last stitch.
-
If you look closely, the difference between this row and the last one is that they are opposites! The knits are purls and the purls are knits!
Finish!
Cast off the stitches on your needle while following the Knit and Purl stitch pattern of Row 1.

Your finished pattern should look the same on both the front and back of the piece.
Rib Stitch: 2 x 1
Prep Step!
Cast on any multiple of 3 stitches to your needle. (ex: 3, 9, 12, 15, …)
Why a multiple of 2? This is because there is a total of 2 stitches in the pattern repeat! (1 + 1 = 2)
Don’t know how to cast-on? Check out this tutorial on How to Cast On Stitches!

Pattern
ROW 1: *K2, P1* until end of row.
ROW 2: *K1, P2* until end of row.
Repeat Rows 1 and 2 until desired length.
Notes:
-
The *asterisks* you see mean that you should repeat the stitches between them until you hit the last stitch.
-
If you look closely, the difference between this row and the last one is that they are opposites! The knits are purls and the purls are knits!
Finish!
Cast off the stitches on your needle while following the Knit and Purl stitch pattern of Row 1.

The back of your finished pattern piece should look something like this:


Recent Comments